This post may contain affiliate links. Please read our Disclosure Policy for details.
While vacationing on Hilton Head Island for Thanksgiving, I decided to attend an activities class for making a tie dye tote. I have been so busy lately, I figured this would provide me with a great opportunity to post a DIY project. Bonnie, our Activities Director, mentioned that she uses the totes for grocery shopping. Great idea, Bonnie!
Lo and behold, the totes are made from t-shirts. More and more, I am finding ways to use the multitude of t-shirts that I somehow possess. I’m really not a t-shirt person, so I usually place my t-shirts into my t-shirt drawer. I know … it makes no sense that I keep these shirts when I know that I am not likely to wear them. My t-shirt collection stems from family reunions, 5Ks, and various group functions that encourage the purchase of an event t-shirt. So let me back up. Yes I possess three 5K t-shirts. I walked in two within the past year or so and volunteered in one. Kudos to my girls and me for keeping it moving.
Back to the tie dye tote. Step 1: 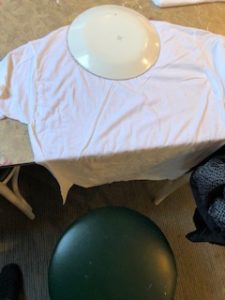 Position a plate half on and half off of the neck area of the shirt and outline with a marker. Remove the plate and cut along the line, making sure you cut beyond the marker line or that the line will not be visible after tie dying.
Step 2: 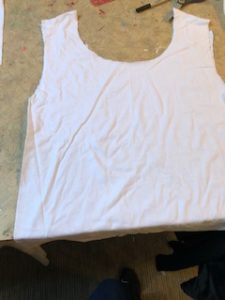 Cut away sleeves including the seams.
Step 3: Using a ruler and marker, place dots 3-3 1/2 inches from the bottom, spacing dots the width of the ruler. 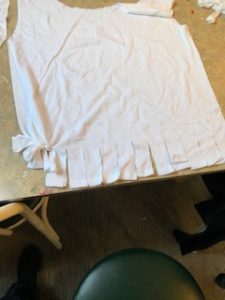 Now cut vertical slits from the bottom up to the dots. Also, cut on each side to ensure there are slits all the way across. Double knot the matching slits from the front and back of the shirt.
Step 4: 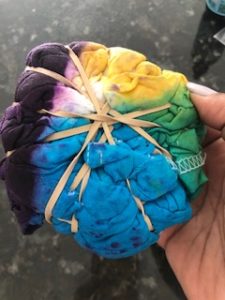 For the swirl effect, place the tip of the ruler in the center of the shirt and twist it around until it is all gathered into the shape of a disc. Carefully place the first rubber band around the width of the shift, then additional rubber bands around the shirt to form the appearance of a pie shape.
For the accordion effect, fold the shirt vertically or horizontally like an accordion or fan, then place 3-4 rubber bands snug and evenly spaced along the length or width of the shirt.
Step 5: In 3-4 separate containers, mix individual Rit Dyes according to package instructions. Wearing rubber gloves, dip your t-shirt partly into the first color and squeeze to remove excess dye. Turn and dip into the second color, squeeze, then dip into the third color and squeeze. Gently fold shirt at center and dip into another color and squeeze or leave the center white.
Step 6: 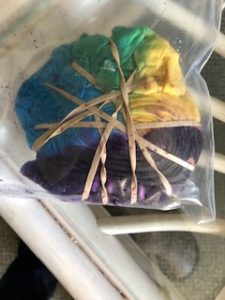 Place shirt in ziplock bag overnight. Lightly rinse a section at a time in cool water and squeeze. Be careful not to allow the colors to run together while rinsing. Air dry on drying rack.
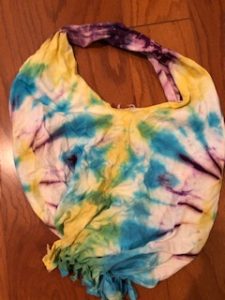
Voila!